Wednesday, August 3, 2011

Fun with Family: Crown Point & Multnomah Falls

I should have posted these pix a week ago. Better late than never!

A little over a week ago, Brenda, Tom & Cayden drove down & spent the weekend with us. We planned to visit Crown Point & Multnomah Falls. It was the first sunny weekend since the 4th of July and everyone else in the Portland/Vancouver area had the same idea (read: the parks were insanely busy).

Cousins at Crown Point

View from Crown Point
Multnomah Falls
Toy Camera app on my iPhone. I love the filter on this app!
Same shot with my Panasonic Lumix
Fun Fact: Gene Simmons (from KISS) has the same camera as me!
Christmas card shot! You are welcome, B!
I posted this photo on Facebook & a friend thought we were twins.
Fun Fact: I am 5 years older!
On Sunday, we took a walk along the Marine Drive Bike Path.
If you haven't done that before, DO! It's so much fun to watch
the airplanes land right next to you!

It was a super fun weekend! Thanks for coming down to visit us B!

Tuesday, August 2, 2011

Make This!!

Orange Breakfast Scones! I found this recipe a few weeks ago in The Seattle Times. This recipe is a must try. It's super simple and even the raw dough tastes delicious. Every bite of these scones is like a slice of sunshine. I am so sun-starved, I have to find my sunshine anywhere I can. :)

Orange Breakfast Scones from the Sweetie Pies Bakery in Napa Valley.

Scones
1 2/3 cup flour
1 1/3 cup cake flour
1/4 cup sugar
3 3/4 t baking powder
1/4 t slat
1/2 cup + 2 T cold butter, cut into cubes
1/4 c currants (I used dried cranberries)
2 T orange zest
1 egg
1/4 cup + 3 T half & half
3/4 t orange juice
1/4 cup heavy cream
1/ c turbinado sugar

Orange Frosting
1 cup powdered sugar
2 T butter
1 T orange juice
2 to 4 T milk

Into a stand mixer fitted with a paddle attachment, combine the flours, sugar, baking powder & salt
Over low speed, add the butter cubes & mix just until the mixture resembles a coarse meal, about 3 minutes.
Add the currants & orange zest, and mix just to combine.
Into a medium bowl, whisk together the egg, half & half & orange juice. With the mixer running, slowly add the liquid mixture until incorporated, careful not to overmix.
Remove the dough from the bowl & place on a lightly floured surface. Press the mixture together to form a cohesive mass. Roll or press to a thickness of 1 inch & cut into desired shapes (scraps may be rerolled one time & cut again).
Place the scones on a parchment-line baking sheet about 1.5" apart, and cover and chill overnight (or freeze for one hour). Shortly before baking, heat the oven to 375*.
I didn't have enough room for the baking sheet in my freezer,
so I used a dinner plate instead. It worked just fine!

Brush the scones with the heavy cream & sprinkle over the turbinado sugar. Bake the scones until risen, the bottoms are browned & the tops are golden-brown in spots, 25-35 minutes, depending on the oven. Rotate the scones halfway through baking to ensure even coloring.
Remove the scones & cool on a wire rack.
Frosting: In the bowl of a stand mixer or in a large bowl, combine the powdered sugar & butter. Mix using the paddle attachment (or a hand mixer) until the butter is softened & incorporated. With the mixer running, slowly add the orange juice. Add the milk, 1 T at a time, until the frosting is just pourable.
Brush or drizzle the frosting over the scones. Serve immediately.

Thursday, July 28, 2011

Wednesday, July 27, 2011

Fun with Flashlights - Part 2!

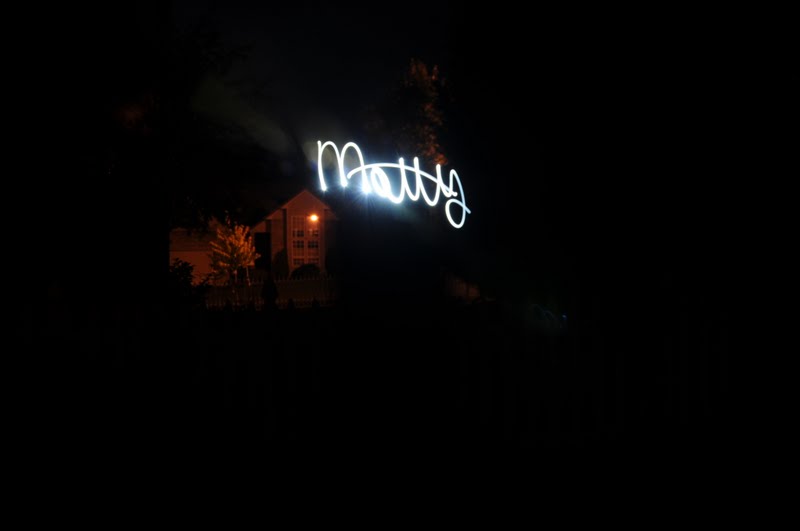
We played around with light painting once again last night. We tried using glow sticks, but they weren't bright enough. Matty placed plastic wrap (colored with markers) around our LED flashlights to get some color. It worked great!


I love the sky in the background of this photo. Beautiful!

Remy!
 Can you see him sitting still for the photo? Such a good boy!


Make This!!

Chocolate Peanut Butter Swirls
For some reason, Blogger won't let me place the photo horizontally. Sorry!

People either love or hate this cookie. WE LOVE THEM!

 My mom found this recipe on the back of a Cheerios cereal box way back when. I remember we made them for a church potluck one time. I stood in front of the platter and ate about ten of them. This girl named Rhonda came up and asked what they were. I told her how good they were & she popped one in her mouth. She immediately started gagging and spit it out. I was horrified! She wasted a perfectly good cookie! This is why I say people either love or hate this cookie. So far, Rhonda is the only one I know who dislikes this cookie. Make these & decide for yourself!

Chocolate Peanut Butter Swirls

1 cup peanut butter
1/2 c powdered sugar
1/2 c light corn syrup
2 cups plain Cheerios
1/2 package chocolate chips
2 T water

Mix peanut butter, powdered sugar, & corn syrup in medium bowl. Stir in Cheerios. Shape mixture into 1 1/2 inch balls, flatten slightly. Heat chocolate chips in water in saucepan over low heat, stirring constantly until melted. Dip tops of cookies into chocolate. Place on waxed papered cookie sheet & chill until firm. Keep in air tight container in fridge.

Tuesday, July 26, 2011

Make This!!

Chicken pillows!
If you like Costco's chicken bakes, then you will definitely like these.

I found two different recipes and kind of combined the two fillings. Both called for gravy, but I opted just to serve these as is from the oven with a green salad. These were very easy to make and I will definitely make these again!

Chicken pillows from Mel's Kitchen Cafe, click HERE.
Chicken pillows from The Girl Who Ate Everything, click HERE.


Fun with Flashlights!

Omid & Matty were playing around with the settings on our camera last night. It's called 'light painting.' You can find specific instructions on various YouTube videos. It was a lot of fun! If you have a camera that will let you manipulate the shutter settings (& you have a super bright flashlight) - try this!!! We spent over an hour outside last night, trying to one up each other on our creativity.


 This is supposed to be a 'dog.' Can you tell?
 This is how the dog was supposed to look:


 Yay! Our favorite school!
 This pix is my favorite!
♥♥♥♥!

Tuesday, July 19, 2011

Make This!!

Fresh Cherry Turnovers!

Our friend Lin recently gave us several pounds of fresh cherries. They were so delicious, I wanted to make a fresh cherry pie with some of the fruit. I found a tasty recipe for fresh cherry turnovers from Recipe Girl instead. The filling was so good, I was eating it out of the bowl before I even assembled the dough.  The dough was just as good. Butter & cream cheese rich. What's not to like?

 At first, my dough looked like it was just a giant ball of cream cheese. I kneaded it a few times and it was perfect. The next time I make these, I will definitely make a double batch of the dough. A single batch was not enough.

Friday, July 15, 2011

Cancer Can Suck it!

 One thing that cancer didn't count on when it picked on my friend Christina:
she is gonna kick it's butt!

Please keep Christina in your prayers!! She has come so far to beat breast cancer only to have doctors find a mass in her liver yesterday. Prayers are needed!!!

Monday, July 11, 2011

Make This!!

Peanut Butter Cheesecake Brownie Babies!

I found this recipe a few years ago in a free magazine I used to receive (Kraft Food & Family). These are SO delicious! If you love chocolate & peanut butter - you will LOVE these!
Remy got to lick the beater clean (for a second day in a row!).

Ready for the oven.
Please excuse my muffin pan. I've had it since college & it's loved!

Finished product. Chewy & delicious!


Peanut Butter Cheesecake Brownie Babies

1 pkg brownie mix (13x9 pan size)
1 pkg (8 oz) cream cheese
1/3 cup sugar
1 egg
1/2 tsp vanilla
1/4 cup peanut butter

Preheat oven to 350*. Prepare brownie batter as directed on package. Spoon into 20 paper lined muffin cups. Beat cream cheese, egg, sugar, peanut butter & vanilla with mixer until blended. Spoon 1 rounded Tbsp. into center of batter in each cup, pressing lightly into batter. Bake 30 minutes or until centers are set. Cool. Refrigerate.

Sunday, July 3, 2011

Make This!!

Never tried Cougar Gold cheese? Oh, boy - are you missing out!!

When visiting Pullman, a must stop is Ferdinand's (WSU Creamery) for delicious cheese & ice cream. I'll admit - I skipped the ice cream and just sampled the cheese. I had a feeling I should purchase an entire can of Cougar Gold, but opted to buy a small wedge instead. I also bought three other flavors. Now I know...buy the entire can. Why? Because we haven't even been home from Pullman for 36 hours and the entire of wedge of Cougar Gold is GONE! 

The creamery suggested making this version of macaroni & cheese with their Cougar Gold. I was so excited to make it & prepared this tasty dish for Matty & I. It was so good, I licked my plate clean. No joke. Make this. You won't be dissapointed.

Classic Baked Macaroni & Cheese (from WSU Creamery)

Preheat oven to 350°F and grease a 1 ½ quart baking dish.

6 cups water
1 1/2 tsp salt
2 cups (8 ounces) corkscrew pasta
2 Tbsp butter
2 Tbsp all-purpose flour

2 1/2 cups milk
2 1/2 cups grated Cougar Gold®
1 Tbsp butter
1/2 cup fresh breadcrumbs
ground black pepper, to taste
Bring the water, salt and pasta to a rolling boil in a medium saucepan. Cook just until tender. Drain pasta, put into prepared baking dish and set aside. Meanwhile prepare the sauce. In a saucepan over medium-low heat, melt 2 tablespoons of butter. While whisking, gradually add the flour. Whisk for about 2 minutes or until golden and bubbling. Very slowly add the milk, whisking constantly to avoid developing lumps. Simmer for 15 minutes until thickened, stirring often to prevent mixture from burning. Remove from heat and stir in Cougar Gold® and black pepper to taste. Pour sauce onto cooked pasta (do not stir). Melt 1 tablespoon butter and toss with breadcrumbs. Sprinkle on top of casserole and bake for 30 minutes or until the crumbs are golden.

Serves 4-6 main-course servings; 8-10 side-dish servings.