
Hi Hat Cupcakes!! Oh boy these were a lot of work, but oh-so-worth-it! The frosting tastes just like a toasted marshmallow after the skin has been removed. The photo below is how they are supposed to turn out. I had visions all afternoon that my hi-hats would look exactly like this. I was so hopeful. First lesson learned: It is ESSENTIAL to have the proper equipment if you want your cupcakes to turn out like this. Don't substitute a 1/4" cake decorating tip if the directions call for a 1/2" tip. Your cupcakes will not look like the beautiful picture below. Bakerella's beautiful cupcakes - Photo by Bakerella
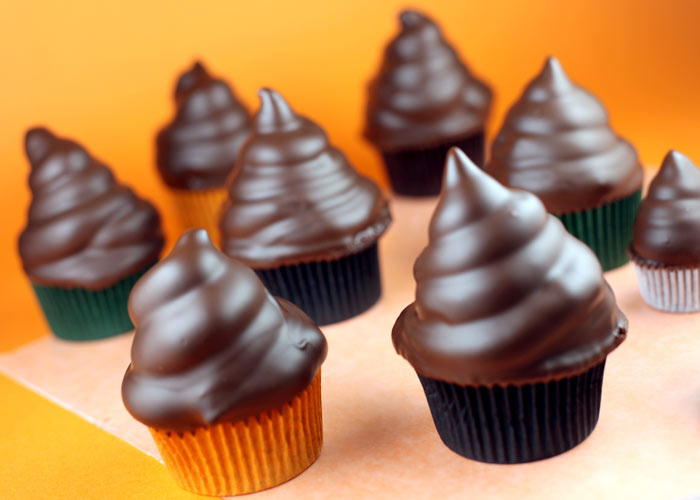 Bakerella's beautiful cupcakes - Photo by Bakerella
 Mini hi hat.
I think the minis turned out better than the regular sized ones.
 Cross section of the mini
 Setting up in the freezer.
Notes: I used a regular chocolate cake mix, not from scratch. This saved me time. These cupcakes take a HUGE amount of time to prepare. Don't have anything planned for two hours or more if you make these. Also, Bakerella's frosting took 12 minutes, mine took 20 minutes. My frosting never got to 160* on the candy thermometer. I figured after 2o minutes (when the stiff peaks finally appeared, it was done). The chocolate coating part was the easiest. I was worried each time I dipped the cupcakes that the frosting would come off. It didn't. I will definitely make these again. I plan to head to Michael's today to purchase the correct cake tip so mine can 'hopefully' turn out like Bakerella's.
1 comment:
I've made those before and I remember thinking that they were super time consuming. They were a hit though.
Post a Comment